Color, Color, Color!

photo 4 (2)These are the color charts for the dyes that I mixed. The code is:CB is chocolate brown. 2cb means 2 Tbsp plus 1 Tbsp Basic Red plus 1 Tbsp Sun Yellow. I liked that color, so I named it Warm Brown.

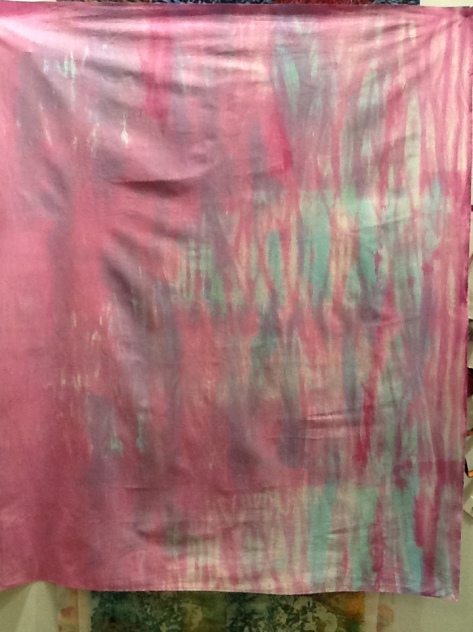
If you can read the notes, you can tell how I mixed the colors and then named the final mixture. This is important in case you want to remix the same color to dye some more fabrics that relate to each other. photo 2 (10)This is a painted screen still drying. I love the way this turned out. I have 6 other screens, but they are really boring to look at in this state.photo 1 (13)This is the paper that was under the screen while I was printing it. At least you can see some of the colors I used. The circles were on a different screen, but I didn’t change the paper. There was a lot of dye on the patterned mask and on the paper so I laid a piece of soda soaked fabric on it and got a monoprint. It is “batching”, so I will post a picture later.photo 3 (5)
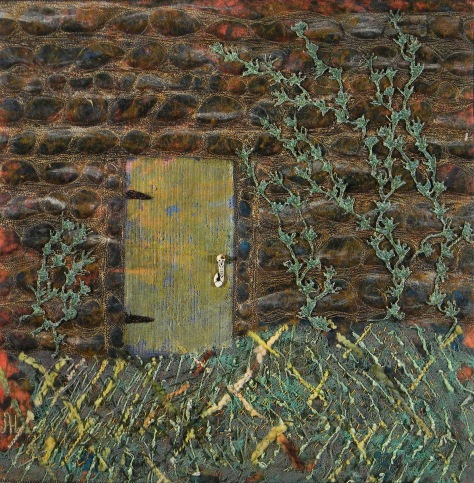
This is a stencil my husband cut for me to use as a mask. I had taken pictures of the stones in our courtyard. I used the stencil on 2 screens.

Dye Is Calling

18 July 18, 2014I have been quilting a lot on a jelly fish piece which has presented several challenges along the way. However, I can’t stay away from the dye and/or surface design very long. It draws me away from everything else. 

Here I am getting set up to mix some dye concentrates. I always run out of Sun Yellow first. So, I am also mixing up some Chocolate Brown and some Basic Red. These are not pure colors, but I believe they will be quite useful. It is very hard to mix a brown from the pure colors. 

My intention is to paint some silk screens with thickened dyes so I can make some more deconstructed screen prints. I have been very pleased with the way they turn out. 

My palette will include Brown, red, rust orange, green, purple and gold. I always love those colors. 

Friendship Quilt for Material Mavens

Today is the reveal day for another blog. Material Mavens is a group of art quilters from all over the country. I was lucky enough to be invited to join them. The theme for this month’s challenge is Friendship. I chose this theme. I am posting my Friendship quilt here, but if you go to the Material Mavens blog, you can see all of the quilts as they appear today.photo 1 (10) resize

Jane’s Friendship Quilt

Friendship Colors My World Happy!


I don’t know if friendship meets the criteria for a theme word, but I chose it because we are ending the first round of quilt challenges for Material Mavens. I have not been a member for the entire time, but the friends I have made through quilting and this group are very important to me. I love meeting new people through quilting. It affords me the opportunity to make new bonds with like minded people. So…Friendship Colors My World Happy!

I started with a piece of fabric I had dye painted during my  dyeing session when several friends gathered to create colorful fabrics. This piece was “wet into wet” and utilized bright primary colors. I quilted it in free motion hearts using 2 variegated threads in the needle. Then I needle felted a larger heart with bamboo roving, yarn, silk threads, and organza. I direct appliquéd a black felt heart to the quilt, then stitched the felted heart to it. The quilt is finished with black zigzag stitching.

You, my new friends, are quite an inspiration to me. Thank you for welcoming me into your group. Happy Quilting!


More Photos

photo 1 (11)This is the very dark piece that I intend to cut up. Very dark pieces can be very useful.photo 3 (5)This is the one that I chose to use my stamps on. It has copper paint as well as the black. I don’t know if it is finished.photo 2 (10)This one was made using my friend’s stamp. I like the patterns. I was using a blended blue and burnt sienna paint. 

I hope to get back to you soon with some more work in progress. I am presenting the program at the Muskogee Quilt Guild this week. I was supposed to go there in January, but I was snowed in. They were gracious enough to reschedule. I am looking forward to meeting the quilters.

Fabric Painting Stress Busters

Well…I think it is a bad thing to start a blog and then ignore it for a month. Sometimes life and stress sucks the creativity right out of me. Things are better now, and I hope to post more regularly.

Yesterday I was able to get into the studio and work on some painting to jump start my creative efforts with surface design. I found four pieces of fabric that I considered failures and added paint to bring them back to life. These are about the size of a fat quarter. The first one I worked on started out as a deconstructed silk screen. It turned out quite pale after washing and rinsing. I really think it was a polyester cotton blend that somehow sneaked into my pfd fabrics. First  I used Painted Wonder Under which I cut into odd shapes and fused to the fabric. Then I stamped on brown and black paint. Then I added copper paint which looked good. After heat setting the paint, I decided to add copper foil. I used bonding powder plus the wonder under also fused the foil. It is hard to see the sparkle in the picture, but it is very apparent in person. 

The other pieces I worked on were first dye painted while I was at QSDS in Ohio. I overdyed them after I got home. I still was not happy with them, so I stamped and added paint in many ways. One of them turned out very very dark. I will probably cut it up and use it somehow. One of them turned out pretty cool because I used my friend’s stamp. It made a nice print.

Okay, I am having a bit of trouble adding the pictures today. I will keep trying.

Results After Washing

I thought you might like to see the results of my shibori dyeing. I used 2 yards of white cotton which was previously soaked with soda ash. I didn’t get quite as much contrast as I expected on the piece that was wrapped around the pipe. That is the nature of dyeing. It is almost always surprising.


I am happy with both pieces, but the piece dyed on the plastic chain is a bit more dramatic. I like the waves of color and the shading from top to bottom. The color is not exactly right but fairly representational of the results. Image

Shibori Dyeing

Today I am dyeing some fabric using two different shibori techniques. One technique involves wrapping fabric around a plastic chain. The other technique is wrapping fabric around a PVC pipe. I have learned most of my dyeing techniques from Ann Johnston’s books and DVD. She is a true master with dye and natural fabrics.

I have started a quilt with jellyfish on it. I recently took a class at QSDS with Sue Benner, another master in dyeing and quilting. She taught us Expressive Dye Painting. After I came home, I made some monoprints using Sue’s techniques. I was quite happy with some of them and started this quilt. Now I am dyeing some more fabric to use with the monoprints. I am also experimenting with putting dye on polyester organza. There is no way it will fix on the polyester fabric. I may not use it on the quilt because of that.

An important lesson I learned from Sue Benner is to record your color mixes. Since I decided to dye more fabric in the same color scheme that I had used last week, I could never have reproduced those colors without a record.

Here are some photos of my work.ImageImage